

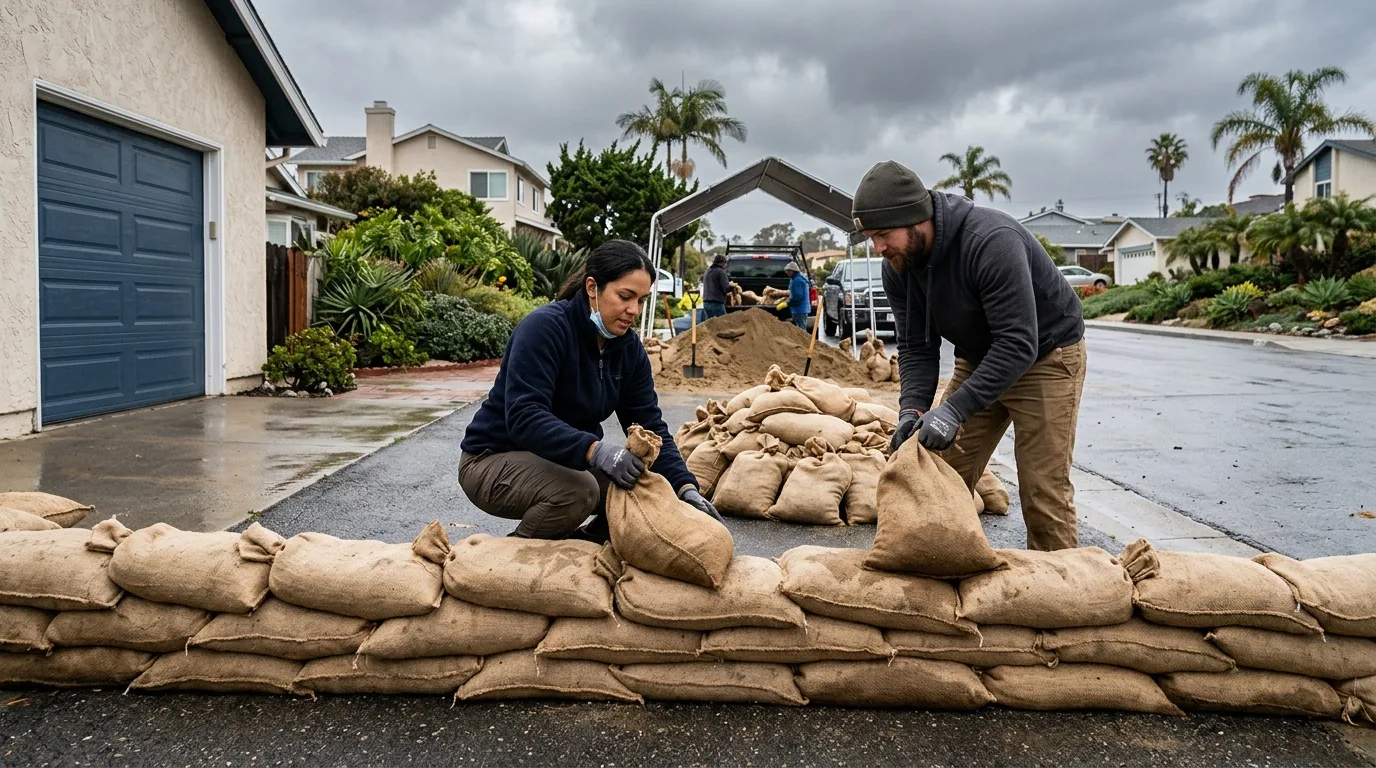
Sandbags filled with sand are a classic and widely used way to protect a building from floodwater in an emergency. They are made of woven polypropylene or burlap (jute).
The principle is simple. A wall of bags makes a physical barrier that turns the flow of water around the thing you are protecting (a house, a yard) or holds it back at a certain level. The dense mass of sand takes up the energy of the flow. A badly built wall, though, gets washed out quickly. Below is where to get free sandbags in San Diego before a storm, how to fill sandbags, how to stack sandbags, and what such a wall can and cannot do.
Where to Get Sandbags in San Diego
The first question is usually where to get sandbags for free. For residents of the City of San Diego the answer is on the City of San Diego storm preparedness page.
- Empty bags only: empty sandbags are available at the City recreation centers listed on that page.
- Limit: 10 bags per City of San Diego household or business.
- Sand: sand is not provided. It can be bought at local hardware stores.
- Check before you go: the list of sites can change, so look at the page for the current locations before a storm, not during it.
- Other cities: if you live in another city in the county, check with your own city or with the county.
It also makes sense to register your cell phone for county emergency alerts through AlertSanDiego, so the warning reaches you while there is still time to put the bags down.
About the Bags Themselves
- Material: a burlap bag is made of jute fabric. It is a coarse, strong natural fiber.
- Fill: sand is used (less often fine gravel or soil). Sand is preferred because it is dense and packs the bag tightly.
- The catch: unlike synthetic bags, jute is biodegradable. But its main weakness in a flood is that it soaks up water. Jute absorbs water, gets very heavy, and with long exposure to moisture starts to rot and lose strength.
Synthetic bags are better for water. Burlap will do, but keep its limits in mind (more on that below).
What Sandbags Are Used For
Sandbags for flooding are used to build temporary waterproof barriers and dikes:
- Protecting buildings: bags are laid around the foundation of a house and at door and window openings to keep water from getting inside.
- Directing the flow: low walls that send water into a safe channel or into the drain, not onto a neighbor's property.
What You Will Need
- Bags: burlap or, better for water, synthetic. A standard size is roughly 14 by 26 inches.
- Fill: clean, dry sand. It must be loose and free-flowing so it fills the bag tightly. Avoid clay or garden soil; they will not make a dense mass.
- Tools: shovels (for filling and for preparing the base), a wheelbarrow (to move sand), work gloves.
- People: flood protection is heavy physical work. It needs a team that works together.
Preparing the Base (the Most Important Step)
How well the barrier works depends less on what the bags are made of and more on how they are laid. The main goal is a solid structure that the water cannot wash out.
You cannot just set bags on loose soil or grass. Water under pressure will wash out the base very quickly, and the wall will collapse. Bags laid on loose or already soaked ground simply "sink."
- Clear the line: remove all debris, stones and plants from where the wall will go.
- Dig a trench: if there is time, dig a shallow trench along the line of the wall, about 6 to 8 inches deep. This "anchors" the structure and keeps water from washing out under the base (underseepage).
- Compact it: level the ground and tamp down the bottom of the trench and the soil on the sides. This gives the bottom row a firm footing.
How to Fill Sandbags
- Not to the top: fill bags about one-half to two-thirds full. An overfilled bag is too heavy and hard to lay evenly. It will not sit snugly against its neighbors and will leave gaps.
- Firm, but not to bursting: each bag should be packed tight, but not so tight that the fabric tears.
- Tie it off: tie the neck of the bag with a simple knot, leaving a small loop for a better grip.
How to Stack Sandbags
Correct stacking is what makes the whole structure strong.
The first row
- Into the trench: lay the first row in the prepared trench or directly on the compacted ground.
- Tight together: lay the bags as close to each other as possible, with no gaps. This is the first barrier for the water.
Next rows: the brickwork rule
This is the basic rule. Bags are not laid in neat columns but with the seams offset. Each next row is laid so its seams fall over the middle of the bags in the row below, as in a brick wall. This covers the vertical gaps and makes the wall act as one piece, with no gaps running straight through.
The "fishtail" profile
This is the most important part of the technique. It keeps the base of the wall from being washed out.
- Water side: the wall should be as vertical as possible. It takes the main force of the flow.
- Your side: the wall should slope outward, away from the water. In cross-section the wall should look like a trapezoid, or a fishtail.
- Why: water pushes on the vertical face and tries to dig under it at the base. The slope on the inside keeps the water from undermining the foundation of your dike from within and keeps the whole structure stable.
Density and height
- No voids: lay bags as tightly as you can. Empty spaces between them are weak points, and water finds them very fast. Press each bag firmly against the ones next to it.
- Several tiers: against a strong flow one row is not enough. Build the wall 2 to 3 tiers high, where the bottom row takes most of the water pressure.
- Seal the joints: after the wall is up, go along all the seams and gaps between the bags with a bucket of wet clay, silt or just wet soil. This adds one more barrier against water seeping through.
A sandbag wall at a door or a garage
A sandbag wall at a door is the same work on a small scale. The bags go across the door or garage opening and along the foundation next to it, on firm ground, tight together, seams offset, in 2 to 3 tiers, with the joints packed with wet soil. With only 10 free bags per household, a low barrier across one opening is usually what you can build, so decide ahead of time which door matters most.
Making the Wall Last Longer
A few steps make any sandbag wall last longer and hold better. All of them keep water off the bags.
- Plastic sheeting (the most effective way): wrap the finished wall on the outside with heavy polyethylene, for example greenhouse film or construction plastic of at least 6 to 8 mil. This creates a waterproof layer between the wet jute and the water.
- How to wrap: start at the bottom and work up, overlapping the strips of film by at least 12 to 20 inches.
- Hold the top edge: fix the top edge of the film on top of the wall with an extra row of bags, boards, or just weigh it down with stones. This keeps water from running in under the film from above.
- Tarp: a heavy tarp with a plastic coating is even stronger than ordinary film and has grommets for tying down.
- A "shell": if you have materials at hand, sheets of plywood, metal or plastic can be leaned against the outside of the wall. They take the main hit of the flow.
The best result comes from combining these steps: dig a trench and lay the first row in it, build the wall with a fishtail profile, and wrap the finished wall on the outside with heavy plastic or a tarp with the top edge held down.
What Sandbags Cannot Do
- It is temporary: a sandbag wall is an emergency measure. Burlap bags lose strength in floodwater. Such a wall will not stand up to a long flood.
- Wet bags get heavy: a soaked burlap bag weighs much more. This puts a huge load on the lower rows and can make the wall slide.
- Do not block the flow completely: if you fully dam a channel without giving the water somewhere to go, the pressure on your wall rises many times over and it will break. The water may also go around or over the wall with even more force. It is better to turn the flow aside.
- It is not a guarantee: sandbag protection is a way to buy time, not absolute safety. When a serious flood threatens, follow the instructions of emergency services and be ready to evacuate.
Never work alone in a flood zone. Fast-moving water has enormous force and can kill.
After the Storm
When the water goes down, the wall has done its job, but the bags have not stopped being a problem. Burlap that sat in water is heavy, and after long contact with moisture the fabric becomes brittle and can literally fall apart, so handle wet bags carefully and with gloves.
Then look at what is behind the wall: floors and the bottom of walls next to the door, the garage, the foundation. If water got in anyway, our guide on what to do first when your basement floods covers the first steps. For wet drywall, flooring or cabinets there is water damage restoration in San Diego; for a musty smell or spots that show up later, mold remediation for flooded homes; and when belongings have to come out while the house dries, pack-out and contents storage services.
You can read more about our restoration team, see what homeowners say in reviews, find other storm and water articles on the blog with more water damage tips, or go back to the restoration company home page.